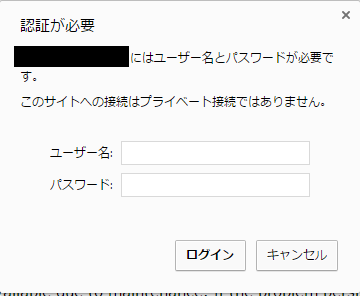
ubuntu16.04でapache2の.htaccessを有効化してip制限をする
.htaccessの有効化
sudo vi /etc/apache2/apache2.conf

### 以下の行がアンコメントアウトされていることを確認
AccessFileName .htaccess

### /var/wwwの設定を変更する
<Directory /var/www/>
        Options Indexes FollowSymLinks
        #AllowOverride None
        AllowOverride All  # NoneからAllへと変更する
        Require all granted
</Directory>
.htaccessの作成
touch /var/www/html/.htaccess
sudo vi /var/www/html/.htaccess
===================================
<Files ~ "^\.ht">
deny from all
</Files>

# AccessControl IP/HOST
order deny,allow
deny from all
allow from 123.456.789
===================================
これで123.456.789.*のIPアドレス以外からのアクセスを制限するようになった
Unityで前のシーンの情報を(無理やり)取得する
Unityは現在のシーン名は取得できるけど、一個前のシーン(つまりどのシーンから遷移してきたか)の取得がデフォルトでできない
色々試行錯誤していたのだけど、以下の方法に落ち着いた
1. データ格納用のクラスを作成
using UnityEngine;
using System.Collections;

public class Data
{
	public readonly static Data Instance = new Data ();

	public string referer = string.Empty;
}
2. 各シーン読み込み時にシーン名を格納する
例えばscene1というシーンだったら
using UnityEngine;
using System.Collections

public class scene1 : MonoBehaviour {
	void Start () {
		Data.Instance.referer = "scene1";
	}
.
.
.
例えばscene2というシーンだったら
using UnityEngine;
using System.Collections

public class scene2 : MonoBehaviour {
	void Start () {
		Data.Instance.referer = "scene2";
	}
.
.
.
3. 遷移元のシーンによって処理を変えたいシーンでシーン名を取得する
例えばscene3というシーンだったら
using UnityEngine;
using System.Collections

public class scene3 : MonoBehaviour {
	void Start () {
		if (Data.Instance.referer == "scene1") {
			処理 1
		} else if (Data.Instance.referer == "scene2") {
			処理 2
		} else {
			処理 3
		}

		Data.Instance.referer = "scene3";
	}
.
.
.
Reference
こちらのサイトを参考にさせていただきました
【Unity】シーン間でスコアを共有 まとめ - テラシュールブログ
AWSのEC2のネットワークの速度を測定する
speed-cliを使ってAWSのインスタンスのネットワーク速度の測定をします
測定方法
install speedtest-cli
sudo apt-get install python-pip
sudo pip install speedtest-cli
sudo pip install speedtest-cli --upgrade
測定
$ speedtest-cli --bytes
Retrieving speedtest.net configuration...
Testing from Amazon (*************)...
Retrieving speedtest.net server list...
Selecting best server based on ping...
Hosted by at2wn (Yokohama) [24.99 km]: 35.168 ms
Testing download speed................................................................................
Download: 37.36 Mbyte/s
Testing upload speed....................................................................................................
Upload: 13.65 Mbyte/s
こんな感じで回線の速度測定がcliで出来ました
ubuntu16.04でApacheのDirectoryIndexを変更する
vi /etc/apache2/mods-available/dir.con
### 以下を修正してapacheをrestartすればよい
<IfModule mod_dir.c>
        DirectoryIndex index.html index.cgi index.pl index.php index.xhtml index.htm
</IfModule>
ubuntu16.04にapacheをinstallしてbasic認証をかける
2. basic auth
touch /etc/apache2/sites-available/auth-basic.conf
vi /etc/apache2/sites-available/auth-basic.conf
### 以下を入力して保存
<Directory /var/www/html>
    AuthType Basic
    AuthName "Basic Authentication"
    AuthUserFile /etc/apache2/.htpasswd
    require valid-user
</Directory>

htpasswd -c /etc/apache2/.htpasswd hoge
  New password: ******
  Re-type new password: ******
  Adding password for user hoge

cd /var/www/html
a2ensite auth-basic
  Enabling site auth-basic.
    To activate the new configuration, you need to run:
    service apache2 reload

sudo /etc/init.d/apache2 restart
もう一度アクセスしてbasic認証がかかっていることを確認

raspberryPIにmp3再生ソフトmpg321をinstallする
1. 出力先の変更
- raspi-configから音声出力をAutoから3.5mmジャックに変更(一応)
2. スピーカーのテスト
$ speaker-test -t sine -f 1000
3. mpg321のinstall
### library install
$ sudo apt-get install mpg321
4. 確認
### 普通に再生
$ mpg321 foobar.mp3

### 音量指定(1-100)
$ mpg321 foo.mp3 -g 10

### ループ(0は無限ループ)
$ mpg321 foo.mp3 -l 3

### デーモンで起動する場合
$ mpg321 foo.mp3 -l 3 > /dev/null 2>&1 &
聞こえないときはraspi側の音量を最大にしてみる
$ alsamixer

|
raspberryPiのバックアップ
raspberryPiはSDカードのバックアップをとることで簡単にコピーすることができます。
必要なツール
- Win32Diskimager
- Win32 Disk Imager 日本語情報トップページ - OSDN
- 基本的にイメージとして書き出せればなんでもいいと思います
方法
読み込み(バックアップ)
Win32 Disk Imagerを起動すると以下のようなWindowが出てくるので、適当にイメージファイル名を入力して、Readを押すとイメージファイルの作成がはじまります

書き込み(復元)
逆にバックアップしたイメージファイルをもとに復元したい時は以下の手順を行います
- SDカードをフォーマット
- imageファイルを指定してWriteボタンを押す
